Table of Contents
MacOS/Linux - Building (Part 1)
Overview
This article outlines the detailed process of building PTerm 1) from sources. Use the navigation provided in the table of contents (on the right) to jump to the correct section.
Project Support
The Retro1 project supports an installer distribution for:
- Windows 11 on Intel/AMD (X86_64 Architecture)
- MacOS on Apple Silicon (ARM64 Architecture)).
About Apple
Although the project will build a self-signed installer, we will not distribute the appication through the Apple Store and therefore, will not pay for a code-signing certificate. If your system will not permit installation without a signed application, you will need to build it yourself.
These are 64-bit application binaries only.
While instructions are provided here to build PTerm on any Linux-like platform, the project will not provide support beyond the two noted above.
Preparation
Gathering and verifying all of the prerequisite tooling, libraries and setting up the Development environment will save time.
- MacOS|Linux Install X-Code To install Xcode, you can download it from the Mac App Store. Alternatively, you can use the command line tool xcode-install to automate the installation process.
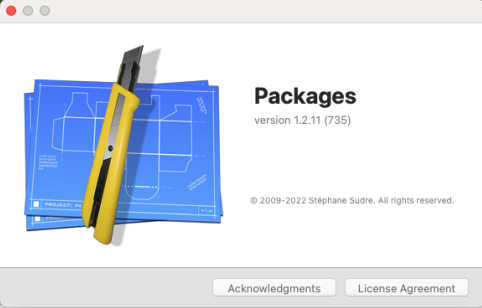
- MacOS Packages Download 1.2.11 If you already have
packagesinstalled, you should read this article for instructions on updating your existing installation. -
- MacOS MacOS Installer
- Linux Linux users will use the Homebrew installer
-
- DO NOT use the pre-built binaries.
-
Repository Structure
This tutorial article relies on the the Hobbyist's prior understanding of the tools noted above. Before proceeding, understading the Development repository's structure is also a critical element in generating a successful build.
Install X-Code (MacOS)

To install Xcode, you can download it from the Mac App Store . Alternatively, you can use the command line tool xcode-install to automate the installation process.
Linux/Home Brew
Before Proceeding
Before proceeding, note that we use Brew because manually building these libraries for each potential platform is onerous to do, and to document. Therefore we recommend that you review the limitations of Brew's Support Tiers before proceeding. If your particular operating system and architecture isn't supported, you will need to figure out the process of building each required library, making the necessary changes to the Makefile, on your own.
To install build tools, paste at a terminal prompt:
Debian or Ubuntu
sudo apt-get install build-essential procps curl file git
Fedora, CentOS, or Red Hat/Rocky
  sudo yum groupinstall 'Development Tools'
  sudo yum install procps-ng curl file git
(NOTE: you may use the 'dnf' command instead of 'yum' on modern installations.)
Arch Linux
sudo pacman -S base-devel procps-ng curl file git
Homebrew
![]()
Homebrew installs packages to their own directory and then symlinks their files into /opt/homebrew (on Apple Silicon) and in /home/linuxbrew on Linux distributions. Homebrew won’t install files outside its prefix and you can place a Homebrew installation wherever you like. It’s all Git and Ruby underneath, so hack away with the knowledge that you can easily revert your modifications and merge upstream updates.
(ALL Platforms)
Bootstrapping Homebrew on Linux or Mac is done by issuing the following command:
/bin/bash -c "$(curl -fsSL https://raw.githubusercontent.com/Homebrew/install/HEAD/install.sh)"
(MacOS)
On MacOS - you may use the Homebrew installation package .
Install Python
![]()
(Linux)
Install Python Minimum version 3.12 or greater, using the Homebrew installer.
brew install python@3.13
(MacOS)
From the Python Download page, install Python using the Universal Installer .
(ALL Platforms)
Ensure that you have the proper version by issuing the following command:
python3 --version
Python will respond with the following information
Python 3.x.y
Where: x (minor version) is 12 or greater and y is the patch level for that minor version
Set the environment variable PYTHONUTF8 to '1':
export PYTHONUTF8=1
You are encouraged to simply add this statement to your .bashrc or equivalent environment-setting resource.
Once installation is complete, you must test the integrated build tool (a Python module called PTDevUtils) by issuing the following command:
python3 -m PTDevUtils version
That command should produce the following response if Python was correctly installed:
 Package PTDevUtils
 Command PTDevUtils
 Version 1.0.1.0
Install Packages
On MacOS, the packaging process is arcane. This tool makes the process (virtually) painless.
Version Check
You must be sure to use version 1.2.11 because there is a bug in prior versions when running on MacOS Sequioa in which the presentation page doesn't load.
Library Setup
wxWidgets

About This Library
wxWidgets is a notoriously 'finicky' library to build and configure. This has been significantly simplified by Homebrew on MacOS, but it it preferable to build wxWidgets “by hand” for all other LINUX platforms. To minimize complexity in the Linux/MacOS build, we use the Brew versions of the libraries.
Static Libraries for MacOS
MacOS
Homebrew's formula for wxWidgets builds the dynamically linked libraries. For packaging, distribution and general reliability, we want the statically-linked libraries. This requires us to modify the brew formula.
Launch the terminal application and perform the following procedure:
- Set the variable
HOMEBREW_NO_INSTALL_FROM_APIto1
export HOMEBREW_NO_INSTALL_FROM_API=1
- Clone the homebrew core repository to the local installation
brew tap –force homebrew/core
-
- Search for the configuration option
“–disable-monolithic”,. - Insert the configuration option
“–disable-shared”,immediately beneath it. :wq(Write/Quit)
- Perform the build
brew install –build-from-source –verbose –debug wxwidgets
Static Libraries for Linux
Linux ANY LINUX SYSTEMS
On Linux systems it is generally preferable (and easier) to manually build the wxWidgets libraries “by hand”.
- Ensure that the dependencies are satisfied:
- RHEL/Rocky Linux:
sudo dnf -y install gtk3-devel
- Debian / Ubuntu:
sudo apt-get install libgtk-3-dev
- Download the sources for wxWidgets-3.2.7
- Unzip/untar the
tar.bz2file into theProjectsdirectory (along-side of the Pterm7 repository directory) aswxWidgets-3.2.7 - Issue the following commands:
 cd <PathTo>/wxWidgets-3.2.7
 md gtk-build
 cd gtk-build
 ../configure --disable-shared --with-gtk
Verify the configuration results:
Configured wxWidgets 3.2.7 for `x86_64-pc-linux-gnu' Which GUI toolkit should wxWidgets use? GTK+ 3 with support for GTK+ printing Should wxWidgets be compiled into single library? no Should wxWidgets be linked as a shared library? no Should wxWidgets support Unicode? yes (using wchar_t) What level of wxWidgets compatibility should be enabled? wxWidgets 2.8 no wxWidgets 3.0 yes Which libraries should wxWidgets use? STL no jpeg builtin png sys regex sys tiff sys lzma no zlib sys expat builtin libmspack no sdl no - Perform the make with 6 parallel processes so the build doesn't take forever:
make -j6
- (Optionally) build the samples and demos
cd samples; make -j6; cd ..
cd demos; make -j6; cd ..
Linux
It is frequently the case that the installed libraries are not in the available load path. The loader path may need to be added prior to execution of pterm. This command may need to be used to update the standard load library path:
export LD_LIBRARY_PATH=/home/linuxbrew/.linuxbrew/lib:$LD_LIBRARY_PATH
The other option is to examine the libraries required using the 'ldd' command 4) to determine which libraries are needed, and simply copy them into the same directory as the executable.
libsndfile
Release Libraries Only
This library is used as-supplied and the release versions of the libraries are linked into both release and debug executables.
NOTE: This library's .dll file is dynamically linked. Therefore, we use Homebrew on all platforms to assure a compatible library binary.
MacOS|Linux
brew install libsndfile
SDL2
Release Libraries Only
This library is used as-supplied and the release versions of the libraries are linked into both release and debug executables.
NOTE: This library's .dll file must be included in the installer.
Linux
On Linux systems, use of the distribution-specific libraries is recommended.
- Debian / Ubuntu
sudo apt-get install libsdl2-dev
- RHEL / Rocky
sudo dnf install SDL2-devel
or
sudo yum install SDL2-devel
MacOS|Linux(Preferred)
brew install sdl2
Next Steps
Part 1 Complete
The development environment should now be fully-functional and ready to build Pterm!