Table of Contents
004 - Build New PLATO
Note
When the system first initializes using the new disk packs, PLATO will start but has some non-fatal issues. You may safely ignore any of those issues for now.
Overview
In this article, we begin the process to upgrade all other parts of the system:
- Login as admin/s for all activities in this exercise.
- Review Build Procedures and files
- Rebuild PLATO Binaries
- Construct a new Deadstart Tape
4.1 Study File Contents
The PLATO build process relies on several procedures. The ones shipped with Release 1 are insufficient and will be replaced during this phase.
PLATO Files Required
- Code File
plmods
This file contains the pre-configured modifications which will be applied to the PLATO system.- IGNORE: block
1-b bu
(it doesn't really apply in present-day builds) - READ: block
1-c mod files
- READ: block
1-d retro1.org
This block contains a detailed itemization of each modification to be applied.
- Code File
tpmods
These are modsets used in all assemblies, but never applied permanently to platopl. In practicality, nothing is permanently applied to platopl any longer.
- Code File
gogomods
modsets used in all assemblies, except the code-sharing full assemblies, and not applied permanently to platopl. the modsets in this file are active during gogo only; they are partialed out before the codesharing assemblies are run. the programmers must reactivate their modsets each week after codesharing is finished.
- Code File
maintp
This file contains the Development Submit File which is used bys0maint- READ: Block
1-b ReadMe - REVIEW: Block
1-c maintp
This block contains the job which replaces the build procedures in maintp/un=plato
- Code File
maintsub
This file contains the core of the utility routines needed for the development process.- System procedures
- Submit Jobs
- Key Configuration Files for “Original” and “New” NOS:
- CMRDECK
- EQPDECK
- IPRDECK
- CONFIG
- MFNX
- MFDX is disregarded in Release2
- Blocks prefixed with
oare the “Original” blocks which should be the same as the ones running at the start of this procedure if all prior steps were done correctly. Blocks without theoprefix are the ones which will replace their respective contents in the deadstart tape.
- Utility submit blocks
getall,getsingleandtgetselectupdate the contents of theocode blocks in this file with different conditions.
- Submit block
getallupdates theoblocks with the contents of the currently running system.
- Submit block
getsingleselectively updates individual blocks from the currently running system contents.
- Submit block
tgetselectto retrieves selected blocks from a deadstart tape which is not currently running.
- READ: Block
1-b ReadMe
- Lesson
s0maint
This is the workhorse upon which we will rely in the construction of the proper job submissions when building parts of the PLATO system.
- Code File
maintdf
This Code File is a listing repository for the output generated during builds.- LISTING BLOCK
dayfilecontains this output.
4.2 Words of Warning
"Just because you can, doesn't mean you should"
This step should be very carefully considered. cdc.io is well-tested but should be used sparingly until this first stage is complete.
Using ''CDC.IO'', all other files that need to transfer from any other installation may be moved dynamically to the new installation.
Danger
Do NOT transfer files to a live system unless you really know what you are doing.
4.3 Prepare NOS
Before PLATO can be built, the core maintenance procedures need to be updated.
- Enter code file
maintp. - Select
c(code blockmaintp) - Shift-LAB to submit this block and wait for job output. You will be transferred to lesson
jobstatto monitor its progress.Warning
The dayfile from this procedure is written to listing block
dayfilein filemaintpso don't return to this code file fromjobstatuntil the job is completed.
Once the job has successfully completed, update the backup (as in Plan B) procedures which may be used through the console to rebuild PLATO.
- Enter code file
maintsub - Select
c(code blockfix-builds) - Shift-LAB to submit this block and wait for job output. You will be transferred to lesson
jobstatto monitor its progress.Warning
The dayfile from this procedure is written to listing block
dayfilein filemaintsubso don't return to this code file fromjobstatuntil the job is completed.
4.4 Rebuild PLATO using New Disks
EXECUTE lesson s0maint (enter the name then press DATA)
Choose Option:
 a. Full Assemblies
 <Press NEXT>
 r. Full System Assembly
 <Press NEXT>
Shift-LAB to invoke personal defaults.
Shift-NEXT to build the batch job.
Shift-LAB to submit the job.
NEXT to view the job in lesson jobstat.
Take a BIO1) Break
Review the dayfile output in code file maintdf block dayfile.
4.5 Build Deadstart Tape
At This Point
PLATO has been built, but does not exist on the deadstart tape. If there is a need to restart the system, the old deadstart tape will still work properly.
Transferring new binaries AND the new configuration elements defined in maintsub to a new deadstart tape is the final stage in performing the upgrade.
Use the show_tape dtCyber command to see the status of the loaded tapes:
At the dtCyber console, attach a new blank tape to NOS Tape unit 51 (C31 E00 U01) using the emulator Operator> prompt. We assume that you have created a dedicated deadstart tape directory called deadstart relative to the location of the cyber.ini file. It is also recommended that you use the naming convention shown below to maintain naming of the deadstart tapes in time sequence:
load_tape 13,0,1,w,YYYYMMDDX.ds.tap
Where YYYYMMDD is the current date and X is the sequence letter A through Z.
- Enter Code File
maintsub. - Enter Block
1-f mkdstart. - Shift-LAB to submit this job.
- The PLATO terminal will be directed to lesson
jobstatbut your attention should be on the NOS Virtual console.- Locate the submitted job.
- When prompted for tape1,
assign,<jsn>,050.(Where <jsn> is the Job Sequence Number of the requesting job.)ASSIGN,<jsn>,050. - When prompted for tape2,
assign.<jsn>,051.(Where <jsn> is the Job Sequence Number of the requesting job.)ASSIGN,<jsn>,051.
This job does very detailed reporting of what it is doing and its output will be generated to the system printer when complete.
You may now detach your new deadstart tape at the dtCyber operator prompt:
unload_tape 13,0,1
Modify ''cyber.ini''
Once the new deadstart tape has been successfully created you should edit cyber.ini (The Deadstart Tape Location) to identify the new deadstart tape file. The other option is to copy/rename the original deadstart someplace and then copy the new tape over the old one.
Preserve Deadstart Images
The backup of a deadstart tape is essential since you will always want a known good deadstart to fall back on if things go wrong.
4.6 TEST Deadstart Tape
At this point, the new deadstart tape should have been properly built and the currently running system may now be shut down and restarted.
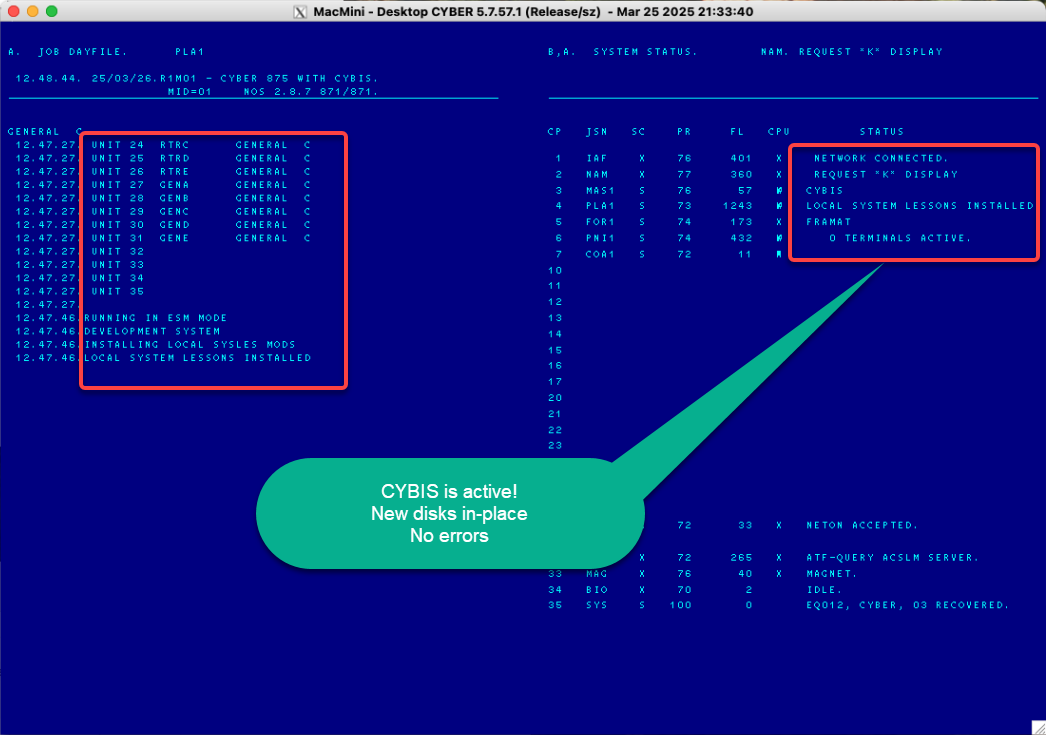
Once the deadstart has completed, on the NOS console issue the E,C. command to check the status of the new disks:

4.7 Start/Test CYBIS
Confirming that there are no errors, proceed to start CYBIS by issuing the NOS console command CYBIS..

Note that there will still be the ERROR - SYSTEM ID .NE. ROUTING ID. Ignore that for the moment and connect a PTerm session.
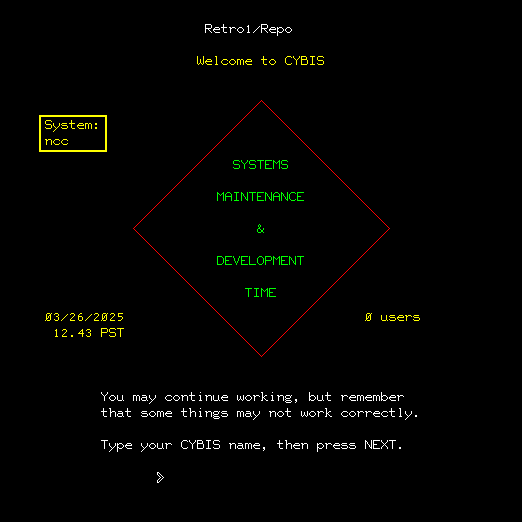
You will see a number of “success indicators”:
- The color functionality is now correct.
- The Welcome to CYBIS screen shows Maintenance and Development Time
You may proceed to log in as admin/s.
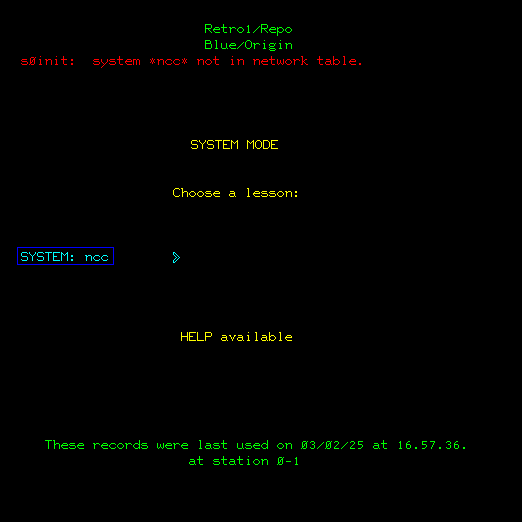
You will see an error message from s0init: system *ncc* not in network table. This is a good thing!
4.8 Purge CONFIGX and Restart CYBIS
Now proceed to:
- Backout all users
- Log off
- Shutdown CYBIS
- NOS> K,MAS1.
- NOS> K.STOP.
- Once CYBIS is fully-terminated:
- NOS> X.DIS.
- NOS> USER(PLATOMF,PLATOMF)
- NOS> PURGE,CONFIGX.
- NOS> DROP.
- NOS> CYBIS.
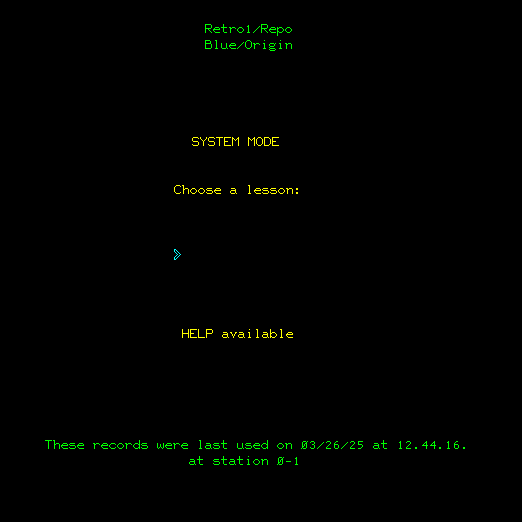
Let CYBIS reinitialize and the following should appear:
You may now re-connect the PTerm session and login as admin/s:
Mission Accomplished!
4.9 (Optional) Update NOS File 'PRODUCT'
- Enter Code File
maintsub. - Enter Block
1-g productupd. - Shift-LAB to submit this job.
- The PLATO terminal will be directed to lesson
jobstat.
When this job completes, the PLATO binaries will have been incorporated into the NOS file PRODUCT/UN=INSTALL on the chance that it may be needed for future enhancements. This file is used by the NCC distribution to maintain an image of the deadstart tape during product installation.
4.10 (Optional) Perform Final Deadstart
Deadstart again… Just to convince yourself that everything is working properly.
4.11 (Optional) Follow-up Exercises
Next Step: Move on to version management and Create a Backup Repository
Next Step: NDL Modification
Next Step: NOS Configuration Summary